Between Rowany Festival (2-7 April, 2015) and May Crown (1-3 May, 2015), I made a 16th c Italian-style gown (circa 1530-40’s).
It is predominantly based on a portrait by Moretto da Brescia (1543-46) – see the woman in blue and brown on the right in the portrait (below).
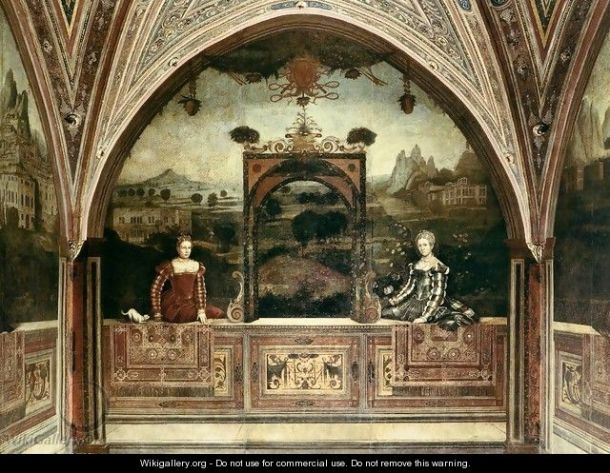
“Female portraits in front of landscapes” oil on Canvas by Moretto da Brescia (1543-46). Source: http://www.wikigallery.org/
My dress is a bitza in that it represents various different Italian styles from the 16th century – the stripes and sleeves from Brescia, Italy (Moretto 1543-46), the shorter bodice from Ferrara, Italy (Kempeneer, 1530’s) and the front lacing from Brescia, Italy (Moretto, 1535).
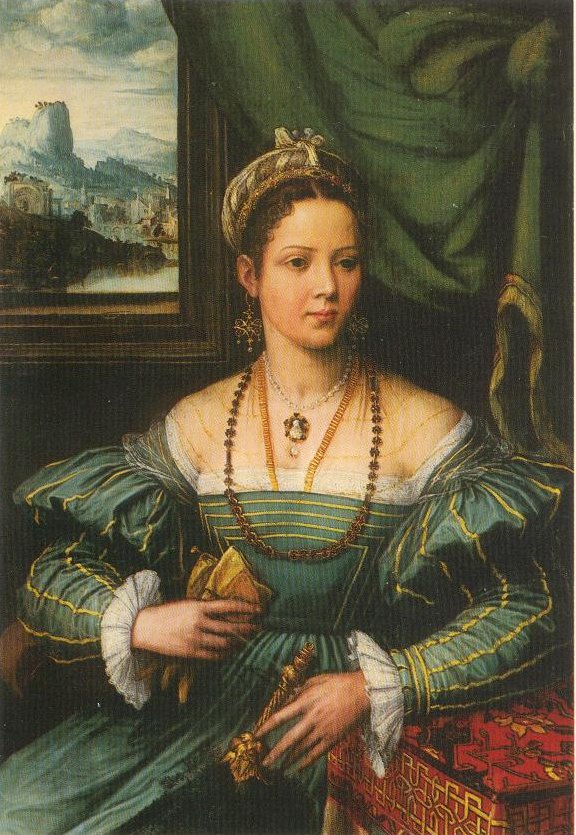
Portrait of a Woman, Peter de Kempeneer, c1530’s. Source: Women in Ferrara on The Realm of Venus: http://realmofvenus.renaissanceitaly.net/wardrobe/ferrara/ferrarawom1.htm
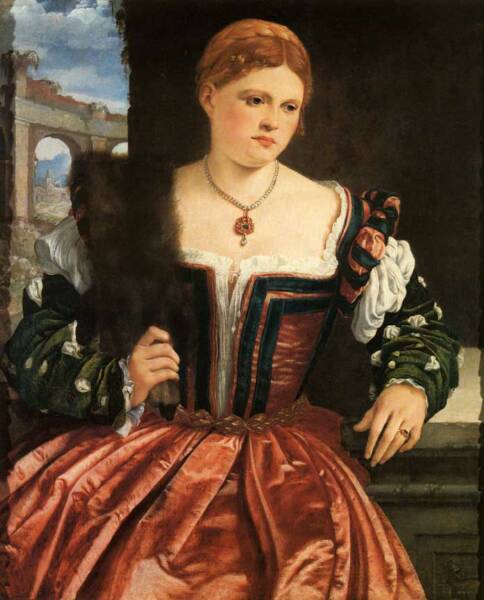
1535 “Portrait Of A Lady”
by Moretto da Brescia. Source: Zibellini’s Pictures and Information – http://www.sablegreyhound.com/ZibelliniPicsAndInfo.html
In order to make a stripey dress, I took an olive green silk that I bought at Pennsic War 2013 and a red-brown silk that I bought at Fields of Gold 2014, and I tore them up into strips that were 3 inches wide (with 2cm seam allowance added). I derived this width by dividing the length of my arm by 8 to match the ratio of stripes in the primary inspiration (the woman in blue and brown stripes has 8 stripes on each sleeve, and the stripes on the body/skirt are approximately the same width).
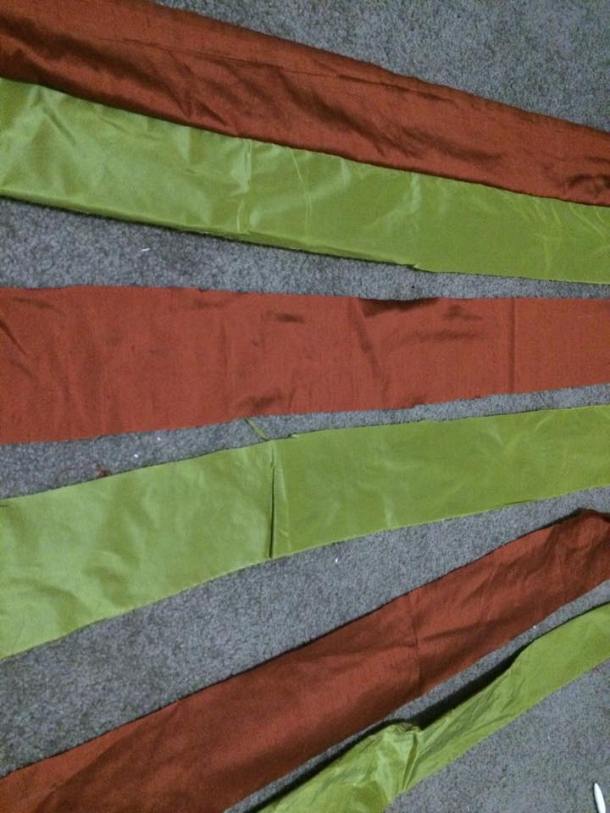
The two coloured silks were torn into 3 inch (plus 2cm seam allowance) strips. Photo by Ceara Shionnach, April 2015.
The strips were then overlocked together because it was the quickest way to join them whilst ensuring the dress would be fray-resistant in the future.

The silk strips were overlocked together to make the base fabric. Photo by Ceara Shionnach, April 2015.

The silk laid out across a bed is the length of the room. Seriously… I spent *hours* sewing strips together… Photo by Ceara Shionnach, April 2015.
The bodice was based on the pattern I had made for my black cotton linen and red cotton linen Italian dresses. The interlining was made of two layers of thick linen, with five pieces of narrow boning sewn into each side-front. The interlining was machine sewn together to expediate the process, and to ensure stability in structure.
Ensuring the stripes lined up across the three pieces of the bodice was a time-consuming process. I had to line up the pattern pieces carefully before cutting them, and I then sewed the striped silk to the outside of the linen interlining by hand using stab-stitch.
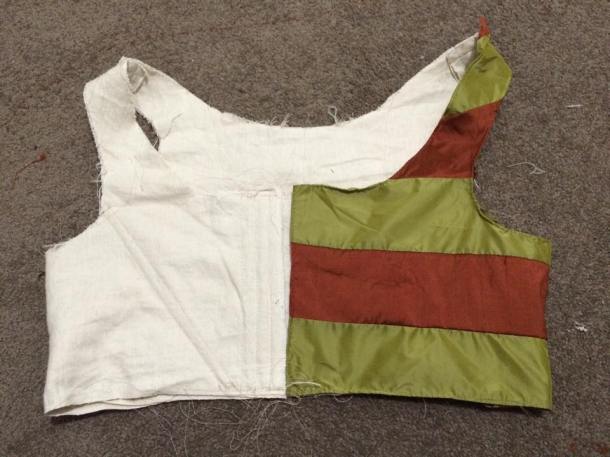
The first of three silk panels is hand stitched to the linen interlining. Photo by Ceara Shionnach, April 2015.
I also attached the blue linen lining to the inside of the interlining by hand before sewing 18 eyelets into the front (on the outside of the inner-most boning to ensure the front of the bodice doesn’t buckle whilst the lacing is tightened).

The outer silk and blue linen lining is hand stitched to the linen interlining. The 9 eyelets on the left side are on. Photo by Ceara Shionnach, April 2015.

A close up of my favourite eyelet, because I’m proud of how neat I got it. Photo by Ceara Shionnach, April 2015.
The next step was to pleat in the 5-6 metres of skirt to the bodice, which was all done by hand with whip stitch.

The inside of the skirt with pleats is visible against the bottom of the blue lining of the dress. Photo by Ceara Shionnach, April 2015.

The 18 eyelets are finished, the skirt is pleated on and the bodice is all together. photo by Ceara Shionnach, April 2015.
Next up was the sleeves. The sleeves are made of 4 panes each plus an entire lining piece. Each sleeve contains nine stripes (the ninth is small and at the top of the sleeve), 28 individual puffs and approximately 32 buttons. The stripes of silk were overlocked together, however, the rest of the sleeves are entirely hand sewn. I used the lessons I learnt from my black Italian dress to improve on my method of construction for this sleeve type.
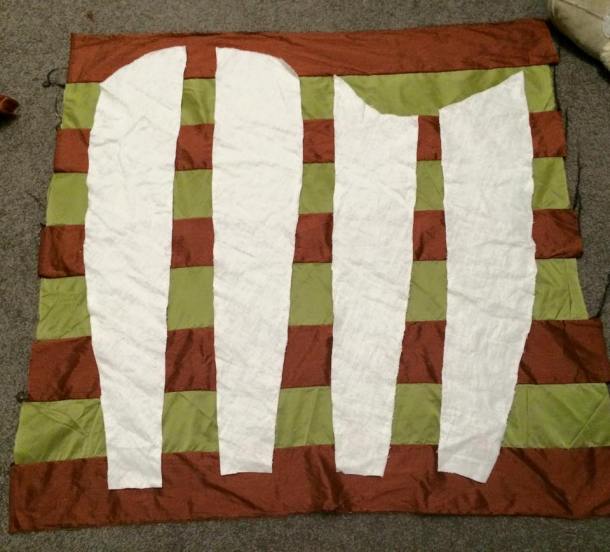
The pattern pieces of the 4-pane sleeve had to be carefully lined up on the stripes to ensure they would line up in the final piece. Photo by Ceara Shionnach, April 2015.

Step 1 – cut out 28 rectangles of a light linen that is approximately 1.5-2 times longer than the length it’s being sewn in to. Photo by Ceara Shionnach, April 2015.

Step 2: pleat in the two long ends to reduce the rectangle length to that of the hole it’s being sewn in to using running stitch. Photo by Ceara Shionnach, April 2015.

Step 3a: using back stitch, I tacked each puff to the inside of the sleeve. Photo by Ceara Shionnach, April 2015.

Step 3b: using back stitch, I tacked each puff to the inside of the sleeve. Photo by Ceara Shionnach, April 2015.
In the gaps where each puff meets the next, a gold-coloured button was sewn down.

One of the sleeves together with all the puffs and some buttons, sans lining. Photo by Ceara Shionnach, April 2015.

A finished sleeve sans buttons (right) beside an in-progress sleeve (left). Photo by Ceara Shionnach, 2015.
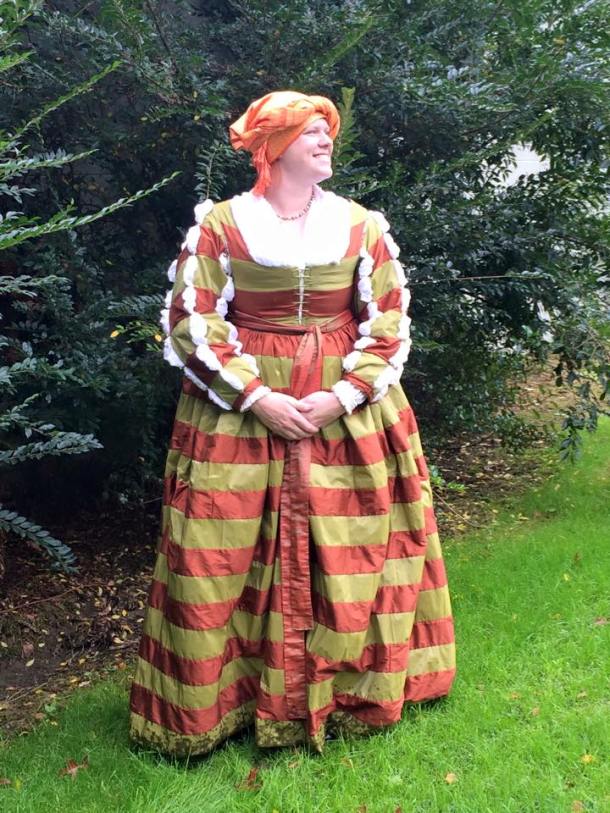
For Lochac’s May Crown 2015, where I first wore the completed dress, I didn’t have time to make headwear. As such, I used an orange shawl as a turban – there are examples of this in 16th c Italian portraiture (including the fringing).

A closer view of the fringed turban. I borrowed a partlet and a silk belt from Baroness Ginevra for the occassion. Photo by Ceara Shionnach, April 2015.
For Great Northern War (5-8 June, 2015), I am hoping to complete a piece of headwear inspired by a Florentine portrait. It is delightfully odd and similar to some of the balzo’s of this time period.
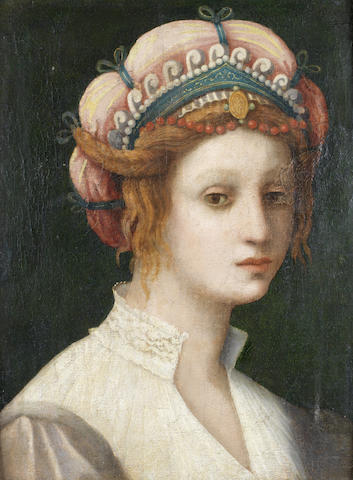
Attributed to Domenico Puligo (Florence 1492-1527)
Portrait of a lady, bust-length, in classical costume. Source: http://www.bonhams.com/auctions/20016/lot/51/

This is magnificent! Lovely lovely work. I’m very proud of you!