Since my last update (3 weeks ago), I’ve managed to finish the background of the squirrel side of my Royal Artisan Project. I’m up to approximately 82 hours of solid embroidery on this piece. It is almost half finished.
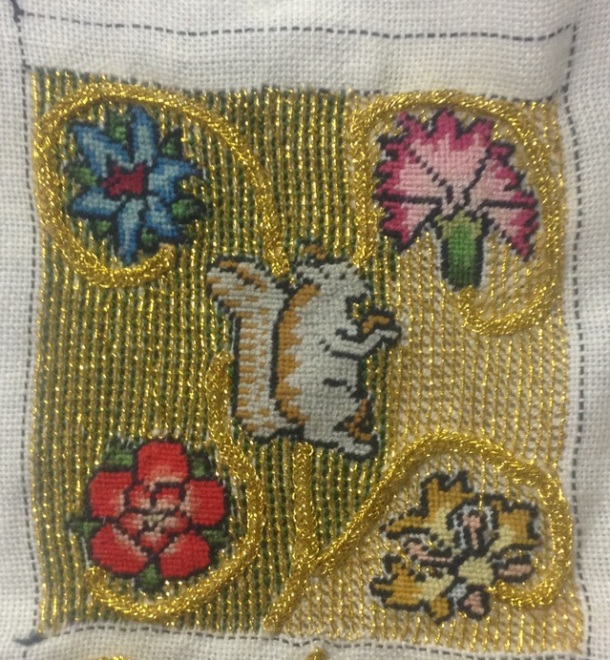
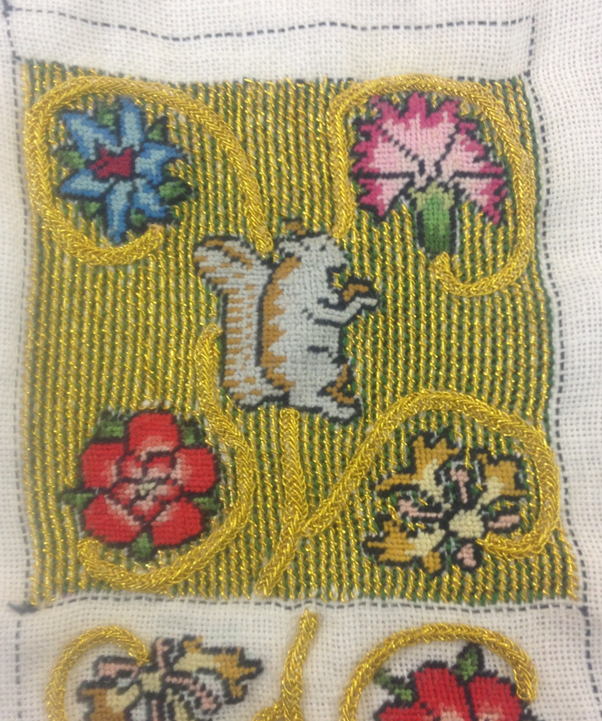
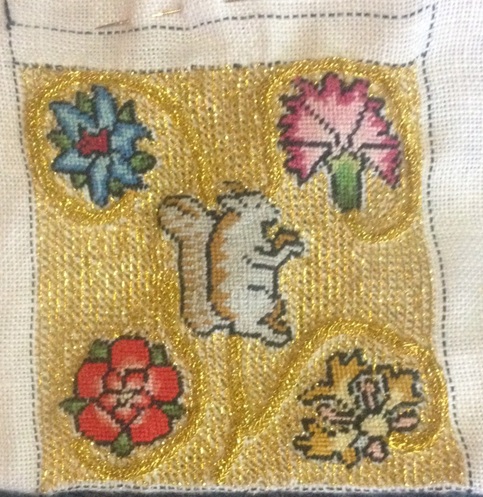
Here are the before and after shots to highlight the progress I’ve made in three weeks:
The background for the sweet bag involves using a self-couched gold thread technique called tramming. This creates columns or rows of gold thread. In between these columns, green silk has been applied in backstitch.
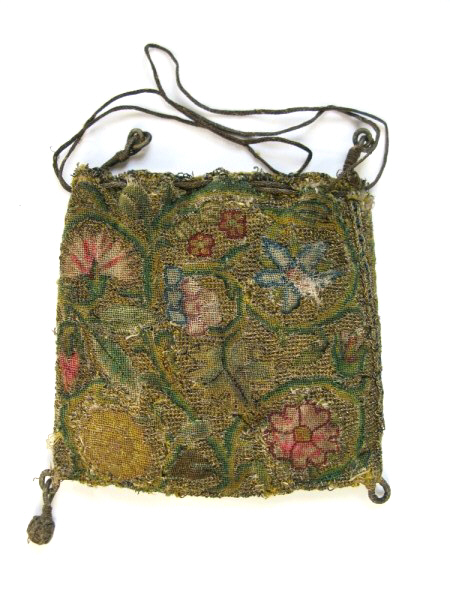
This technique of tramming and backstitch was inspired by a sweet bag displayed by the Manchester Art Gallery (accessed October 2013, see image below).

Manchester Art Gallery (accessed October 2013). Purse & Sweetbag, Europe, United Kingdom (1630-1660). Accession number 1951.441.
Extant sweet bag with metal-thread tramming for the embroidered background.
I learned this technique using the aid of Carey’s (2009) book on sweet bags, which includes detailed instructions on how to execute a range of embroidery (and other) techniques used in the creation of sweet bags.
The first step in this stitch is to apply the gold tramming (see figure below).
Afterwards, the silk backstitch is applied. The example Carey provided was yellow silk backstitch between gold tramming. The image and description of the extant piece (Manchester Art Gallery, accessed October 2013) do not make it clear what colour the silk thread is between the tramming. Because, unlike the extant piece, the coils on my bag were gold, I decided to use a contrasting silk colour. This allowed the coils to pop-out once more, rather than blend in with the background.
An in progress shot of the application of the green backstitch:

As you can see, on the left, the coils stand out more once the green silk backstitch is applied. Furthermore, the backstitch fills in most of the gaps between the columns of tramming.
The next major step in this project is to complete the background for the fox side of the sweet bag in tramming and backstitch.
References:
Manchester Art Gallery (accessed October 2013). Purse & Sweetbag, Europe, United Kingdom (1630-1660). Accession number 1951.441.
Carey, J. (2009). Sweet Bags: An Investigation into 16th and 17th Century Needlework. Published by Carey Company.
ISBN 0 9523225 7 9.


